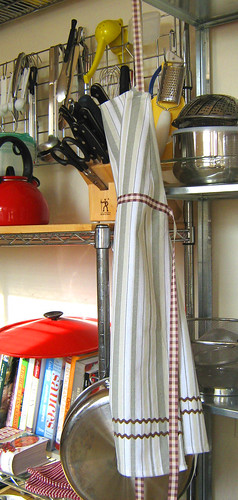
I definately find myself making my own things more often and repurposing items. It has become more than trying to save money. It is a great creative outlet and I feel good when I complete a project. Making unique gifts has especially given me a lot of pleasure. This Monday, we are sharing with you a fun DIY project brought to you by One Pearl Button, a charming craft, fashion and photography blog written by Alli Lucy. Every season needs an apron. What better way to make that Rhurbarb Almond Coffee Cake than sporting this cute little Tea Towel Apron that you crafted all by yourself!
Please go check out One Pearl Button for other great DIY projects like leather and lace bangles. You can also check out Alli’s etsy shop for dreamy polaroids.
www.onepearlbutton.com
Originally posted On One pearl button on 1.15.2009
Tutorial: Tea Towel to Full Apron
First, gather your supplies. You’ll need a large tea towel (one with a design that works when it’s held lengthwise), a few yards of ribbon, and any decorative elements that you’d like to add (plus basic sewing supplies).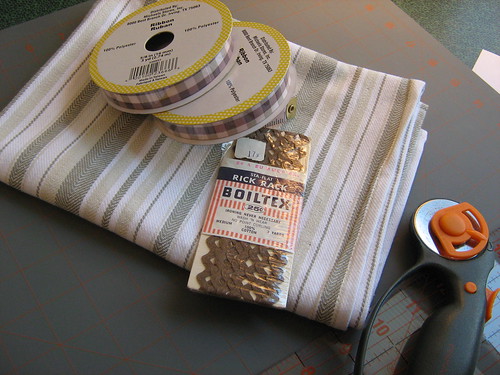
Step 1: give your towel some shape with darts. This will help it look less towel-like and more apron-like. Make a dart at the top of each side of the towel: mine were 8″ long, with the center of each dart positioned about 3″ from the edge of the towel. If you haven’t done darts before, they are incredibly simple, and I’m sure you can find some good tutorials somewhere.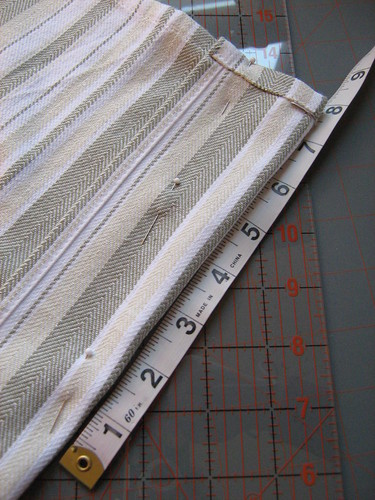
Step 2: Press your darts (pressing the seam allowance towards the center).
Step 3: Grab a length of ribbon that is long enough to fit over your head. Sew each end to the top of the towel, positioning them about 1.5″ in from the side edges (I folded my ribbon ends twice before sewing to prevent fraying).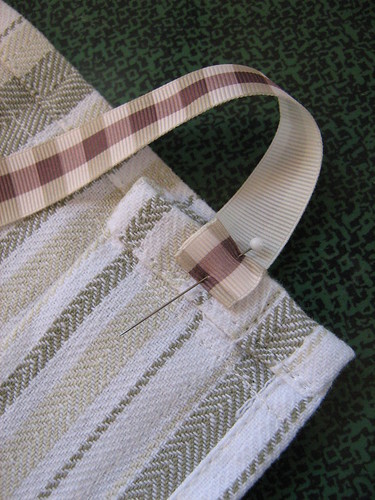
Step 4: Fold each side edge of the towel over the ribbon and sew all the way across the top of the towel. It should really have some shape now!
Step 5: Take another piece of ribbon (long enough to wrap around your waist and tie in back). Position it at about waist height on your towel (I found the height by slipping it over my head and eyballing), pin, and stitch using a wide zig-zag.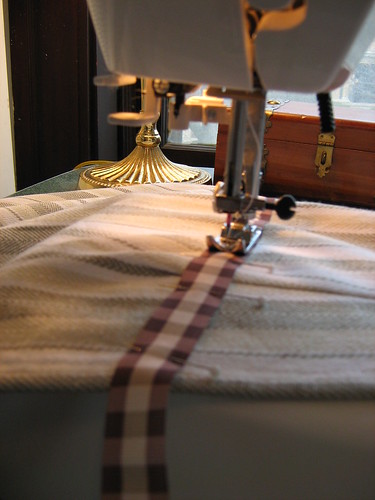
Ta-da! Your towel is now an apron! All that’s left to do is embellish. I kept it simple, just adding two rows of rick rack to the hem. You can basically do anything here: add patch pockets, embroider it, stitch on an applique…the possibilities for personalization are endless!
That’s it! Now put that baby on and bake some cupcakes!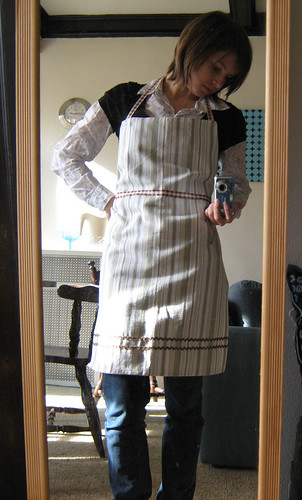


This is a really neat idea. What a great idea for all the foodies in your life. Do we call you Martha? god forbid…..I was only joking!!!And it looks so much nicer than the ones you find in the stores. I can knit up a storm but sewing skills not so much. I really understand your "making do" and recycling approach though. We have an old store a couple of blocks away and we buy any kitchen things from there. They have vintage aprons that are pretty too.
Oh man. I just got a tea towel with *chickens* on it, and was about to do a search on making it into an apron! I want to put giant buttons holding the neck-strap to the top of the bib.
Thank you for your post!